pve虚拟机直通硬件
简介
准备工作
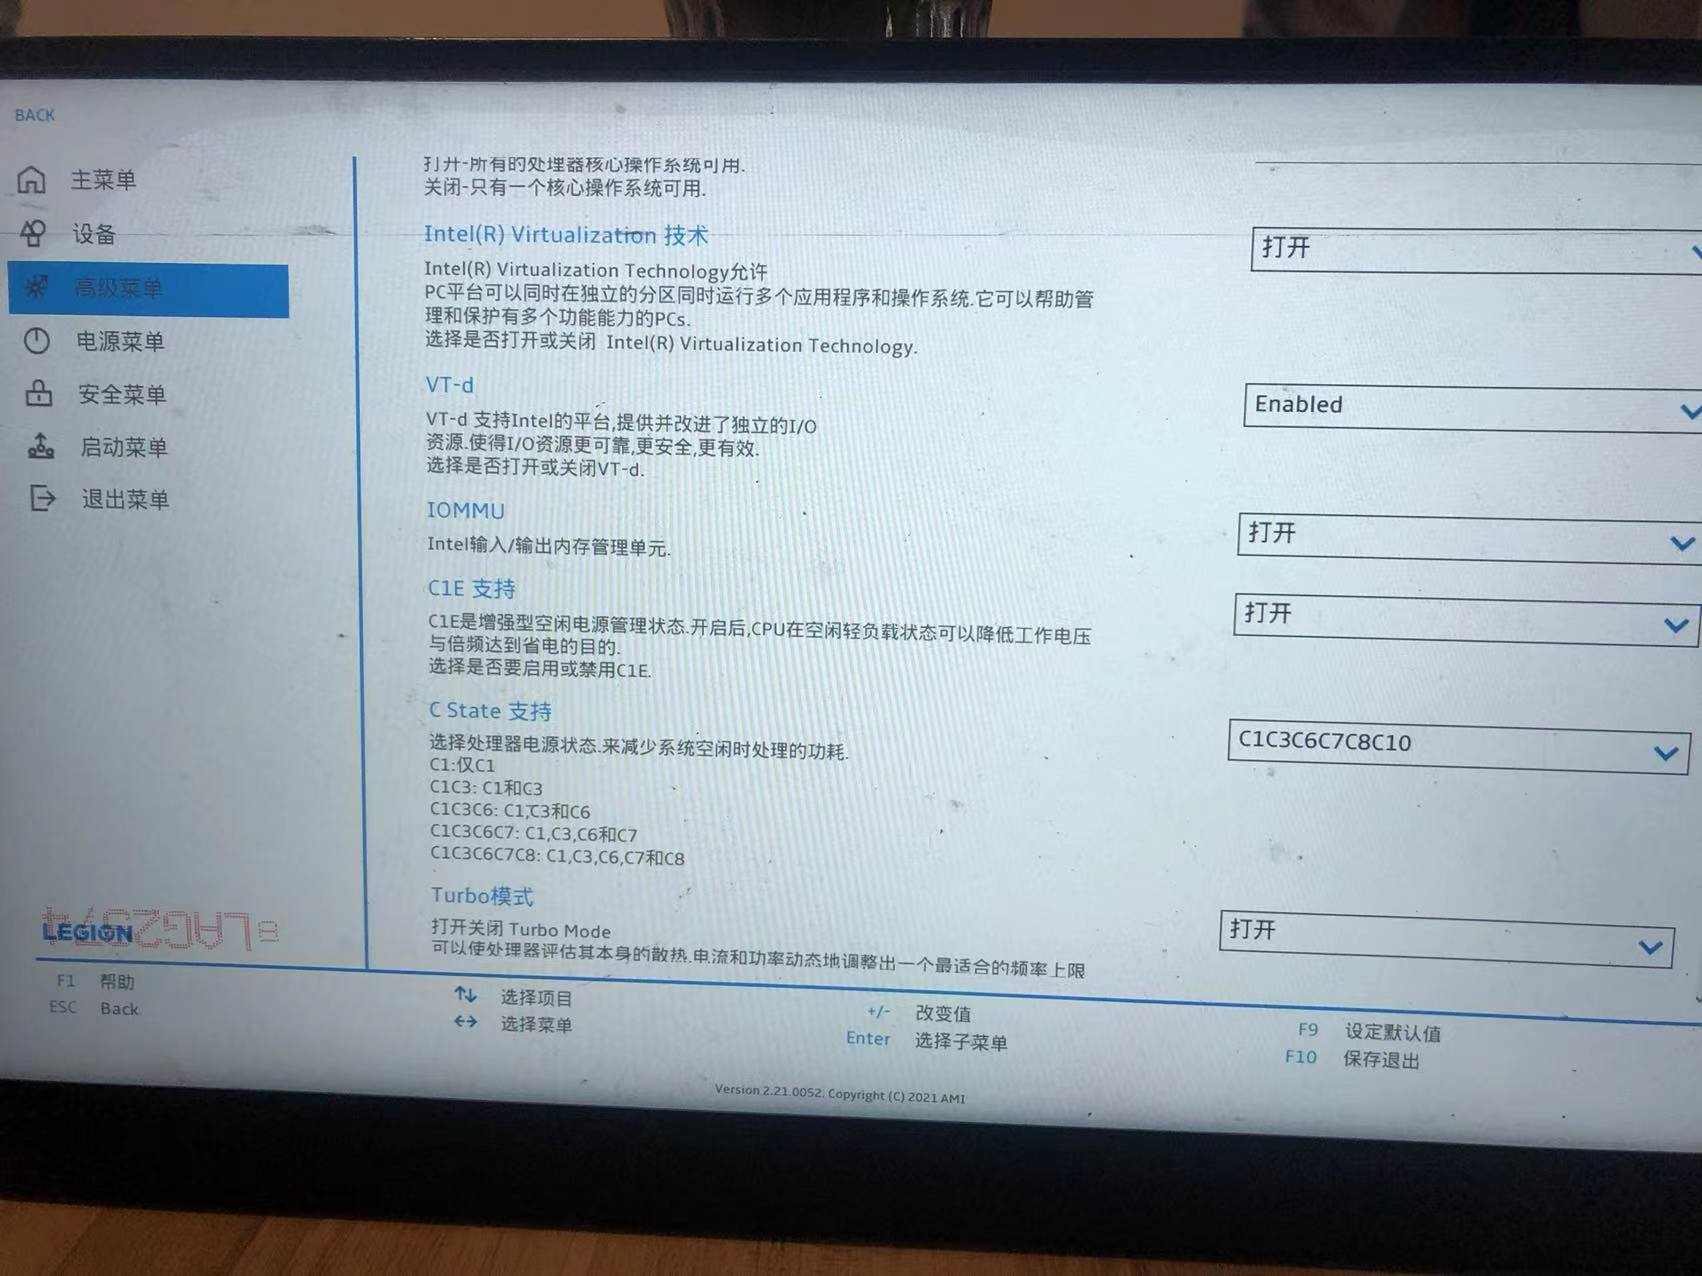
进入bios开启相关选项
开始
启用IOMMU功能 用网页端的 PVE shell 或 ssh 连接至 PVE,输入以下命令:
在文档中找到 “GRUB_CMDLINE_LINUX_DEFAULT=”quiet””一行,
对于 Intel CPU 用户 ,将改行修改为:
1 GRUB_CMDLINE_LINUX_DEFAULT="quiet intel_iommu=on iommu=pt"
对于 AMD CPU 用户 ,将该行修改为:
1 GRUB_CMDLINE_LINUX_DEFAULT="quiet amd_iommu=on iommu=pt"
修改完成后,按 Ctrl+O 保存,按 Ctrl+X 退出文本编辑器。
然后输入下一行命令更新 Grub:update-grub
1
2
3
4
5
6
7
8
9
10
11
12
13
14
15
[1]+ Stopped nano /etc/default/grub root@pve:~# nano /etc/default/grub root@pve:~# nano /etc/default/grub root@pve:~# update-grub Generating grub configuration file ... Found linux image: /boot/vmlinuz-5.15.30-2-pve Found initrd image: /boot/initrd.img-5.15.30-2-pve Found memtest86+ image: /boot/memtest86+.bin Found memtest86+ multiboot image: /boot/memtest86+_multiboot.bin Warning: os-prober will not be executed to detect other bootable partitions. Systems on them will not be added to the GRUB boot configuration. Check GRUB_DISABLE_OS_PROBER documentation entry. Adding boot menu entry for UEFI Firmware Settings ... done
加载相应的内核模块 在命令行中输入以下命令:
1
2
3
4
echo vfio >> /etc/modules echo vfio_iommu_type1 >> /etc/modules echo vfio_pci >> /etc/modules echo vfio_virqfd >> /etc/modules
然后输入update-initramfs -k all -u
注意 這個錯誤在PVE 執行命令經常出現 ,無視即可
No /etc/kernel/proxmox-boot-uuids found, skipping ESP sync.
#No /etc/kernel/proxmox-boot-uuids found, skipping ESP sync.
来更新内核参数。然后重启 PVE 。
验证IOMMU是否开启成功
重启之后,在命令行输入以下命令:
若有如类似于下图回显,则说明开启成功:
1
2
3
4
5
6
7
8
9
10
11
12
13
14
15
16
17
18
19
20
21
22
root@pve:~# dmesg | grep iommu [ 0.249405] iommu: Default domain type: Translated [ 0.249405] iommu: DMA domain TLB invalidation policy: lazy mode [ 0.287371] pci 0000:00:00.0: Adding to iommu group 0 [ 0.287377] pci 0000:00:01.0: Adding to iommu group 1 [ 0.287387] pci 0000:00:06.0: Adding to iommu group 2 [ 0.287394] pci 0000:00:14.0: Adding to iommu group 3 [ 0.287397] pci 0000:00:14.2: Adding to iommu group 3 [ 0.287401] pci 0000:00:14.3: Adding to iommu group 4 [ 0.287407] pci 0000:00:15.0: Adding to iommu group 5 [ 0.287410] pci 0000:00:15.2: Adding to iommu group 5 [ 0.287415] pci 0000:00:16.0: Adding to iommu group 6 [ 0.287419] pci 0000:00:17.0: Adding to iommu group 7 [ 0.287431] pci 0000:00:1d.0: Adding to iommu group 8 [ 0.287439] pci 0000:00:1f.0: Adding to iommu group 9 [ 0.287443] pci 0000:00:1f.3: Adding to iommu group 9 [ 0.287448] pci 0000:00:1f.4: Adding to iommu group 9 [ 0.287451] pci 0000:00:1f.5: Adding to iommu group 9 [ 0.287465] pci 0000:01:00.0: Adding to iommu group 10 [ 0.287477] pci 0000:01:00.1: Adding to iommu group 10 [ 0.287487] pci 0000:02:00.0: Adding to iommu group 11 [ 0.287500] pci 0000:03:00.0: Adding to iommu group 12
再输入:
1 find /sys/kernel/iommu_groups/ -type l
如果有类似于下图回显,就代表成功:
1
2
3
4
5
6
7
8
9
10
11
12
13
14
15
16
17
18
19
20
21
22
root@pve:~# find /sys/kernel/iommu_groups/ -type l /sys/kernel/iommu_groups/7/devices/0000:00:17.0 /sys/kernel/iommu_groups/5/devices/0000:00:15.2 /sys/kernel/iommu_groups/5/devices/0000:00:15.0 /sys/kernel/iommu_groups/3/devices/0000:00:14.2 /sys/kernel/iommu_groups/3/devices/0000:00:14.0 /sys/kernel/iommu_groups/11/devices/0000:02:00.0 /sys/kernel/iommu_groups/1/devices/0000:00:01.0 /sys/kernel/iommu_groups/8/devices/0000:00:1d.0 /sys/kernel/iommu_groups/6/devices/0000:00:16.0 /sys/kernel/iommu_groups/4/devices/0000:00:14.3 /sys/kernel/iommu_groups/12/devices/0000:03:00.0 /sys/kernel/iommu_groups/2/devices/0000:00:06.0 /sys/kernel/iommu_groups/10/devices/0000:01:00.0 /sys/kernel/iommu_groups/10/devices/0000:01:00.1 /sys/kernel/iommu_groups/0/devices/0000:00:00.0 /sys/kernel/iommu_groups/9/devices/0000:00:1f.0 /sys/kernel/iommu_groups/9/devices/0000:00:1f.5 /sys/kernel/iommu_groups/9/devices/0000:00:1f.3 /sys/kernel/iommu_groups/9/devices/0000:00:1f.4
显卡直通 注意
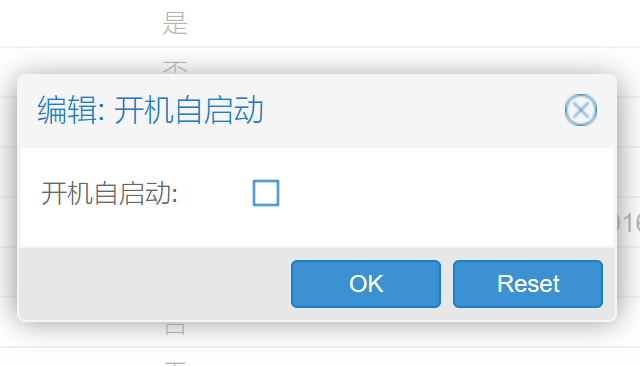
一般地,不推荐将显卡直通给特定虚拟机,有些命令执行不好会造成不可挽回的损失。建议将直通显卡的虚拟机不要勾选“开机自启动”,以便出现问题还可以用命令行救回。
依据自己显卡型号,在命令行输入以下命令:
1
2
3
4
5
6
7
8
9
10
11
12
13
14
15
16
# 直通 AMD 显卡,请使用下面命令 echo "blacklist radeon" >> /etc/modprobe.d/blacklist.conf echo "blacklist amdgpu" >> /etc/modprobe.d/blacklist.conf # 直通 Nvidia 显卡,请使用下面命令 echo "blacklist nouveau" >> /etc/modprobe.d/blacklist.conf echo "blacklist nvidia" >> /etc/modprobe.d/blacklist.conf echo "blacklist nvidiafb" >> /etc/modprobe.d/blacklist.conf # 直通 Intel 核显,请使用下面命令 echo "blacklist snd_hda_intel" >> /etc/modprobe.d/blacklist.conf echo "blacklist snd_hda_codec_hdmi" >> /etc/modprobe.d/blacklist.conf echo "blacklist i915" >> /etc/modprobe.d/blacklist.conf
将显卡绑定至 vfio-pci:
使用 lspci 命令,查看自己显卡的 pci id:
1
2
3
4
5
6
7
8
9
10
11
12
13
14
15
16
17
18
19
20
21
root@pve:~# lspci 00:00.0 Host bridge: Intel Corporation Device 4c53 (rev 01) 00:01.0 PCI bridge: Intel Corporation Device 4c01 (rev 01) 00:06.0 PCI bridge: Intel Corporation Device 4c09 (rev 01) 00:14.0 USB controller: Intel Corporation Device 43ed (rev 11) 00:14.2 RAM memory: Intel Corporation Device 43ef (rev 11) 00:14.3 Network controller: Intel Corporation Device 43f0 (rev 11) 00:15.0 Serial bus controller [0c80]: Intel Corporation Device 43e8 (rev 11) 00:15.2 Serial bus controller [0c80]: Intel Corporation Device 43ea (rev 11) 00:16.0 Communication controller: Intel Corporation Device 43e0 (rev 11) 00:17.0 SATA controller: Intel Corporation Device 43d2 (rev 11) 00:1d.0 PCI bridge: Intel Corporation Device 43b0 (rev 11) 00:1f.0 ISA bridge: Intel Corporation Device 4387 (rev 11) 00:1f.3 Audio device: Intel Corporation Device 43c8 (rev 11) 00:1f.4 SMBus: Intel Corporation Device 43a3 (rev 11) 00:1f.5 Serial bus controller [0c80]: Intel Corporation Device 43a4 (rev 11) 01:00.0 VGA compatible controller: NVIDIA Corporation Device 2489 (rev a1) 01:00.1 Audio device: NVIDIA Corporation GA104 High Definition Audio Controller (rev a1) 02:00.0 Non-Volatile memory controller: Samsung Electronics Co Ltd NVMe SSD Controller PM9A1/980PRO 03:00.0 Ethernet controller: Realtek Semiconductor Co., Ltd. RTL8111/8168/8411 PCI Express Gigabit Ethernet Controller (rev 15)
01:00.0 VGA compatible controller: NVIDIA Corporation Device 2489 (rev a1)
01:00.1 Audio device: NVIDIA Corporation GA104 High Definition Audio Controller (rev a1)
以上图为例,显卡的pci id为 01:00.0 。上面的是显卡,下面的是显卡中的声卡。在直通时两者都要一起直通。接下来,输入lspci -n 命令,查看对应pci id 的 设备 id 和 制造商 id:
1
2
3
4
5
6
7
8
9
10
11
12
13
14
15
16
17
18
19
20
21
root @pve:~# lspci -n00 :00 .0 0600 : 8086 :4 c53 (rev 01 )00 :01 .0 0604 : 8086 :4 c01 (rev 01 )00 :06 .0 0604 : 8086 :4 c09 (rev 01 )00 :14 .0 0 c03: 8086 :43 ed (rev 11 )00 :14 .2 0500 : 8086 :43 ef (rev 11 )00 :14 .3 0280 : 8086 :43 f0 (rev 11 )00 :15 .0 0 c80: 8086 :43 e8 (rev 11 )00 :15 .2 0 c80: 8086 :43 ea (rev 11 )00 :16 .0 0780 : 8086 :43 e0 (rev 11 )00 :17 .0 0106 : 8086 :43 d2 (rev 11 )00 :1 d.0 0604 : 8086 :43 b0 (rev 11 )00 :1 f.0 0601 : 8086 :4387 (rev 11 )00 :1 f.3 0403 : 8086 :43 c8 (rev 11 )00 :1 f.4 0 c05: 8086 :43 a3 (rev 11 )00 :1 f.5 0 c80: 8086 :43 a4 (rev 11 )01 :00 .0 0300 : 10 de:2489 (rev a1)01 :00 .1 0403 : 10 de:228 b (rev a1)02 :00 .0 0108 : 144 d:a80a03 :00 .0 0200 : 10 ec:8168 (rev 15 )
01:00.0 0300: 10de:2489 (rev a1)
以上图的 01:00.0 为例,01:00.0为显卡,01:00.1 为声卡,复制两者后面的 设备id:制造商id(以上图为例,为 10de:2489 和 10de:228b),然后输入以下命令绑定(将<设备id1:制造商id1>和<设备id2:制造商id2>替换为自己设备里的):
1 echo "options vfio-pci ids=<设备id1:制造商id1>,<设备id2:制造商id2>" > /etc/modprobe.d/vfio.conf
以上图为例,则命令为:
1 echo "options vfio-pci ids=10de:2489,10de:228b" > /etc/modprobe.d/vfio.conf
执行完上述命令后,输入以下命令确定回显已设置为自己设备的两个id:
1
2
cat /etc/modprobe.d/blacklist.confcat /etc/modprobe.d/vfio.conf
1 2 3 4 5 6 7 root@pve :~ blacklist nouveau blacklist nvidia blacklist nvidiafb root@pve :~ options vfio-pci ids=10 de: 2489 ,10 de: 228 b
注意 : 对于 Nvidia 显卡 ,需要再输入一条命令更新内核:
1 echo "options kvm ignore_msrs=1" > /etc/modprobe.d/kvm.conf
随后重启 PVE。
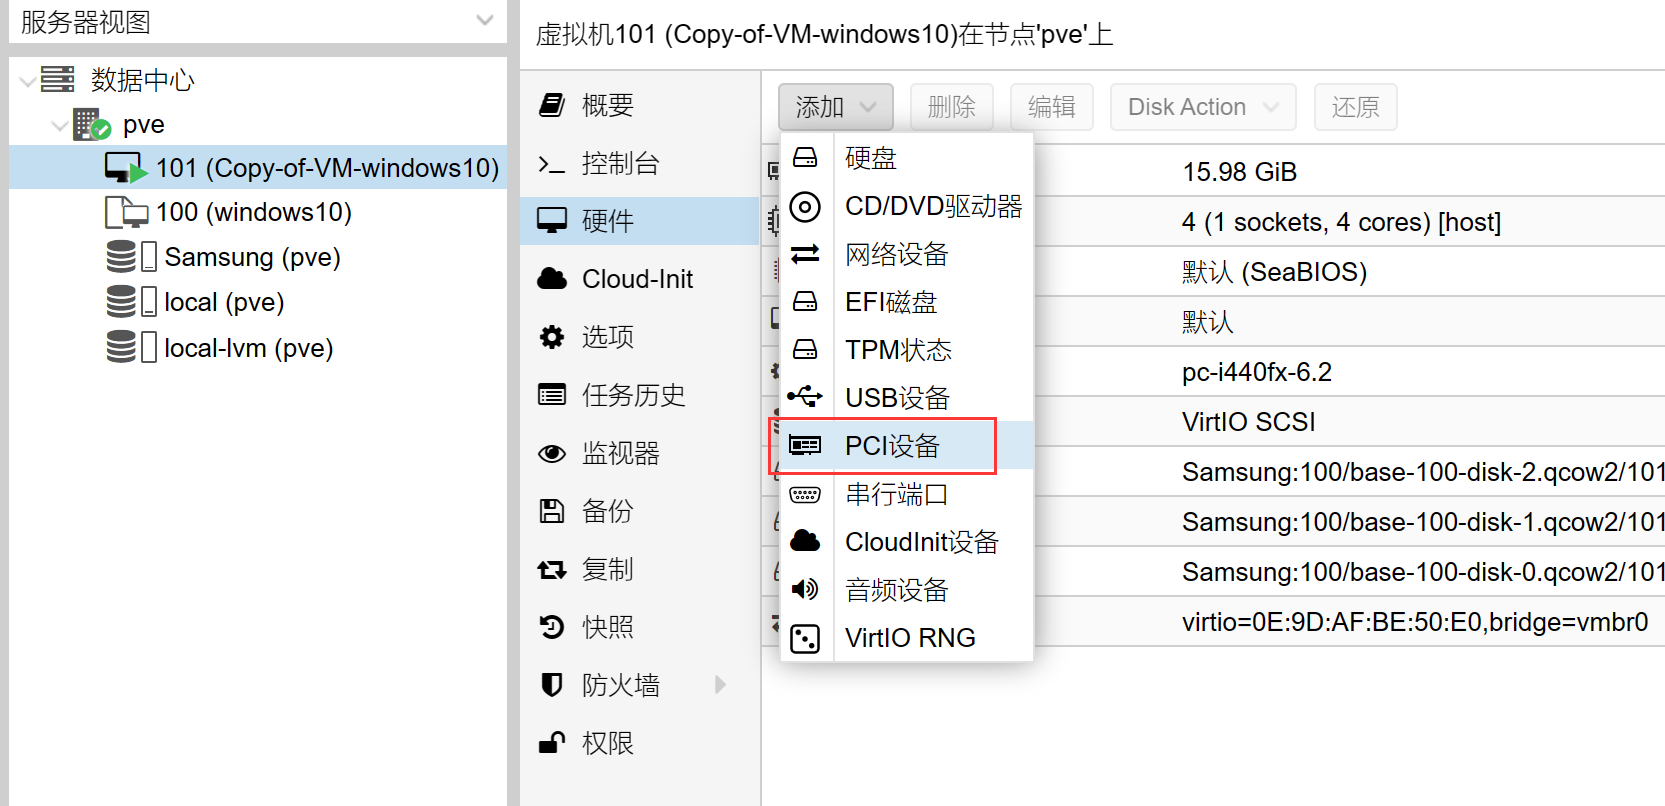
开启直通
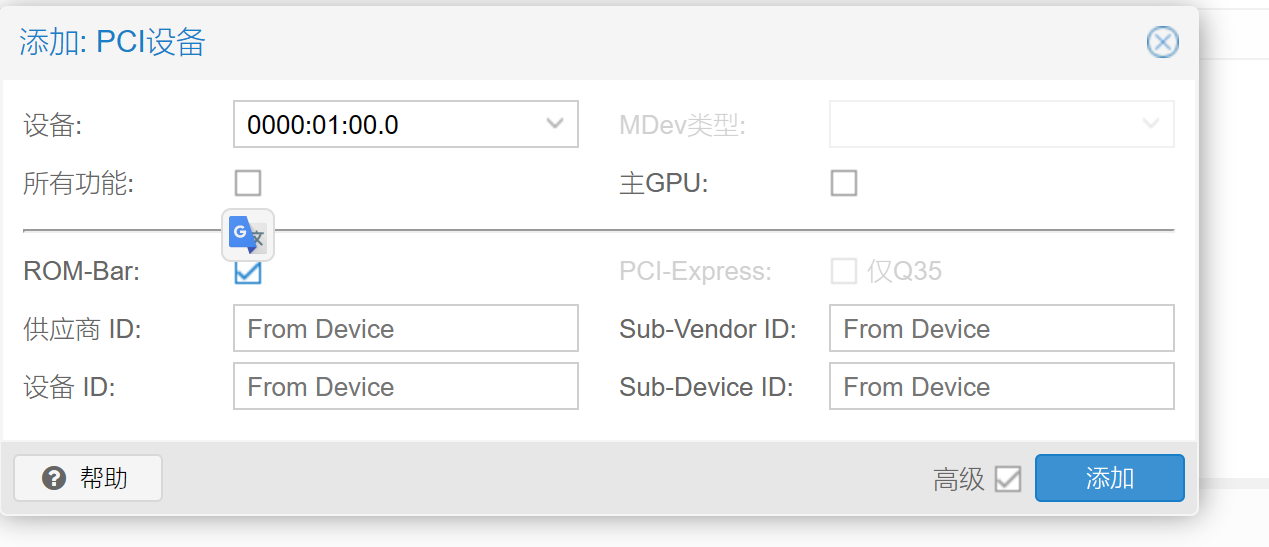
添加PCI设备
然后开始显卡在 PVE 虚拟机里的直通,在硬件里添加“PCI 设备”,设备选择自己显卡型号,勾选 PCI-Express,注意千万不要勾选“主 GPU” 。若不能勾选 PCI-Express,将机器类型更改为 q35 :
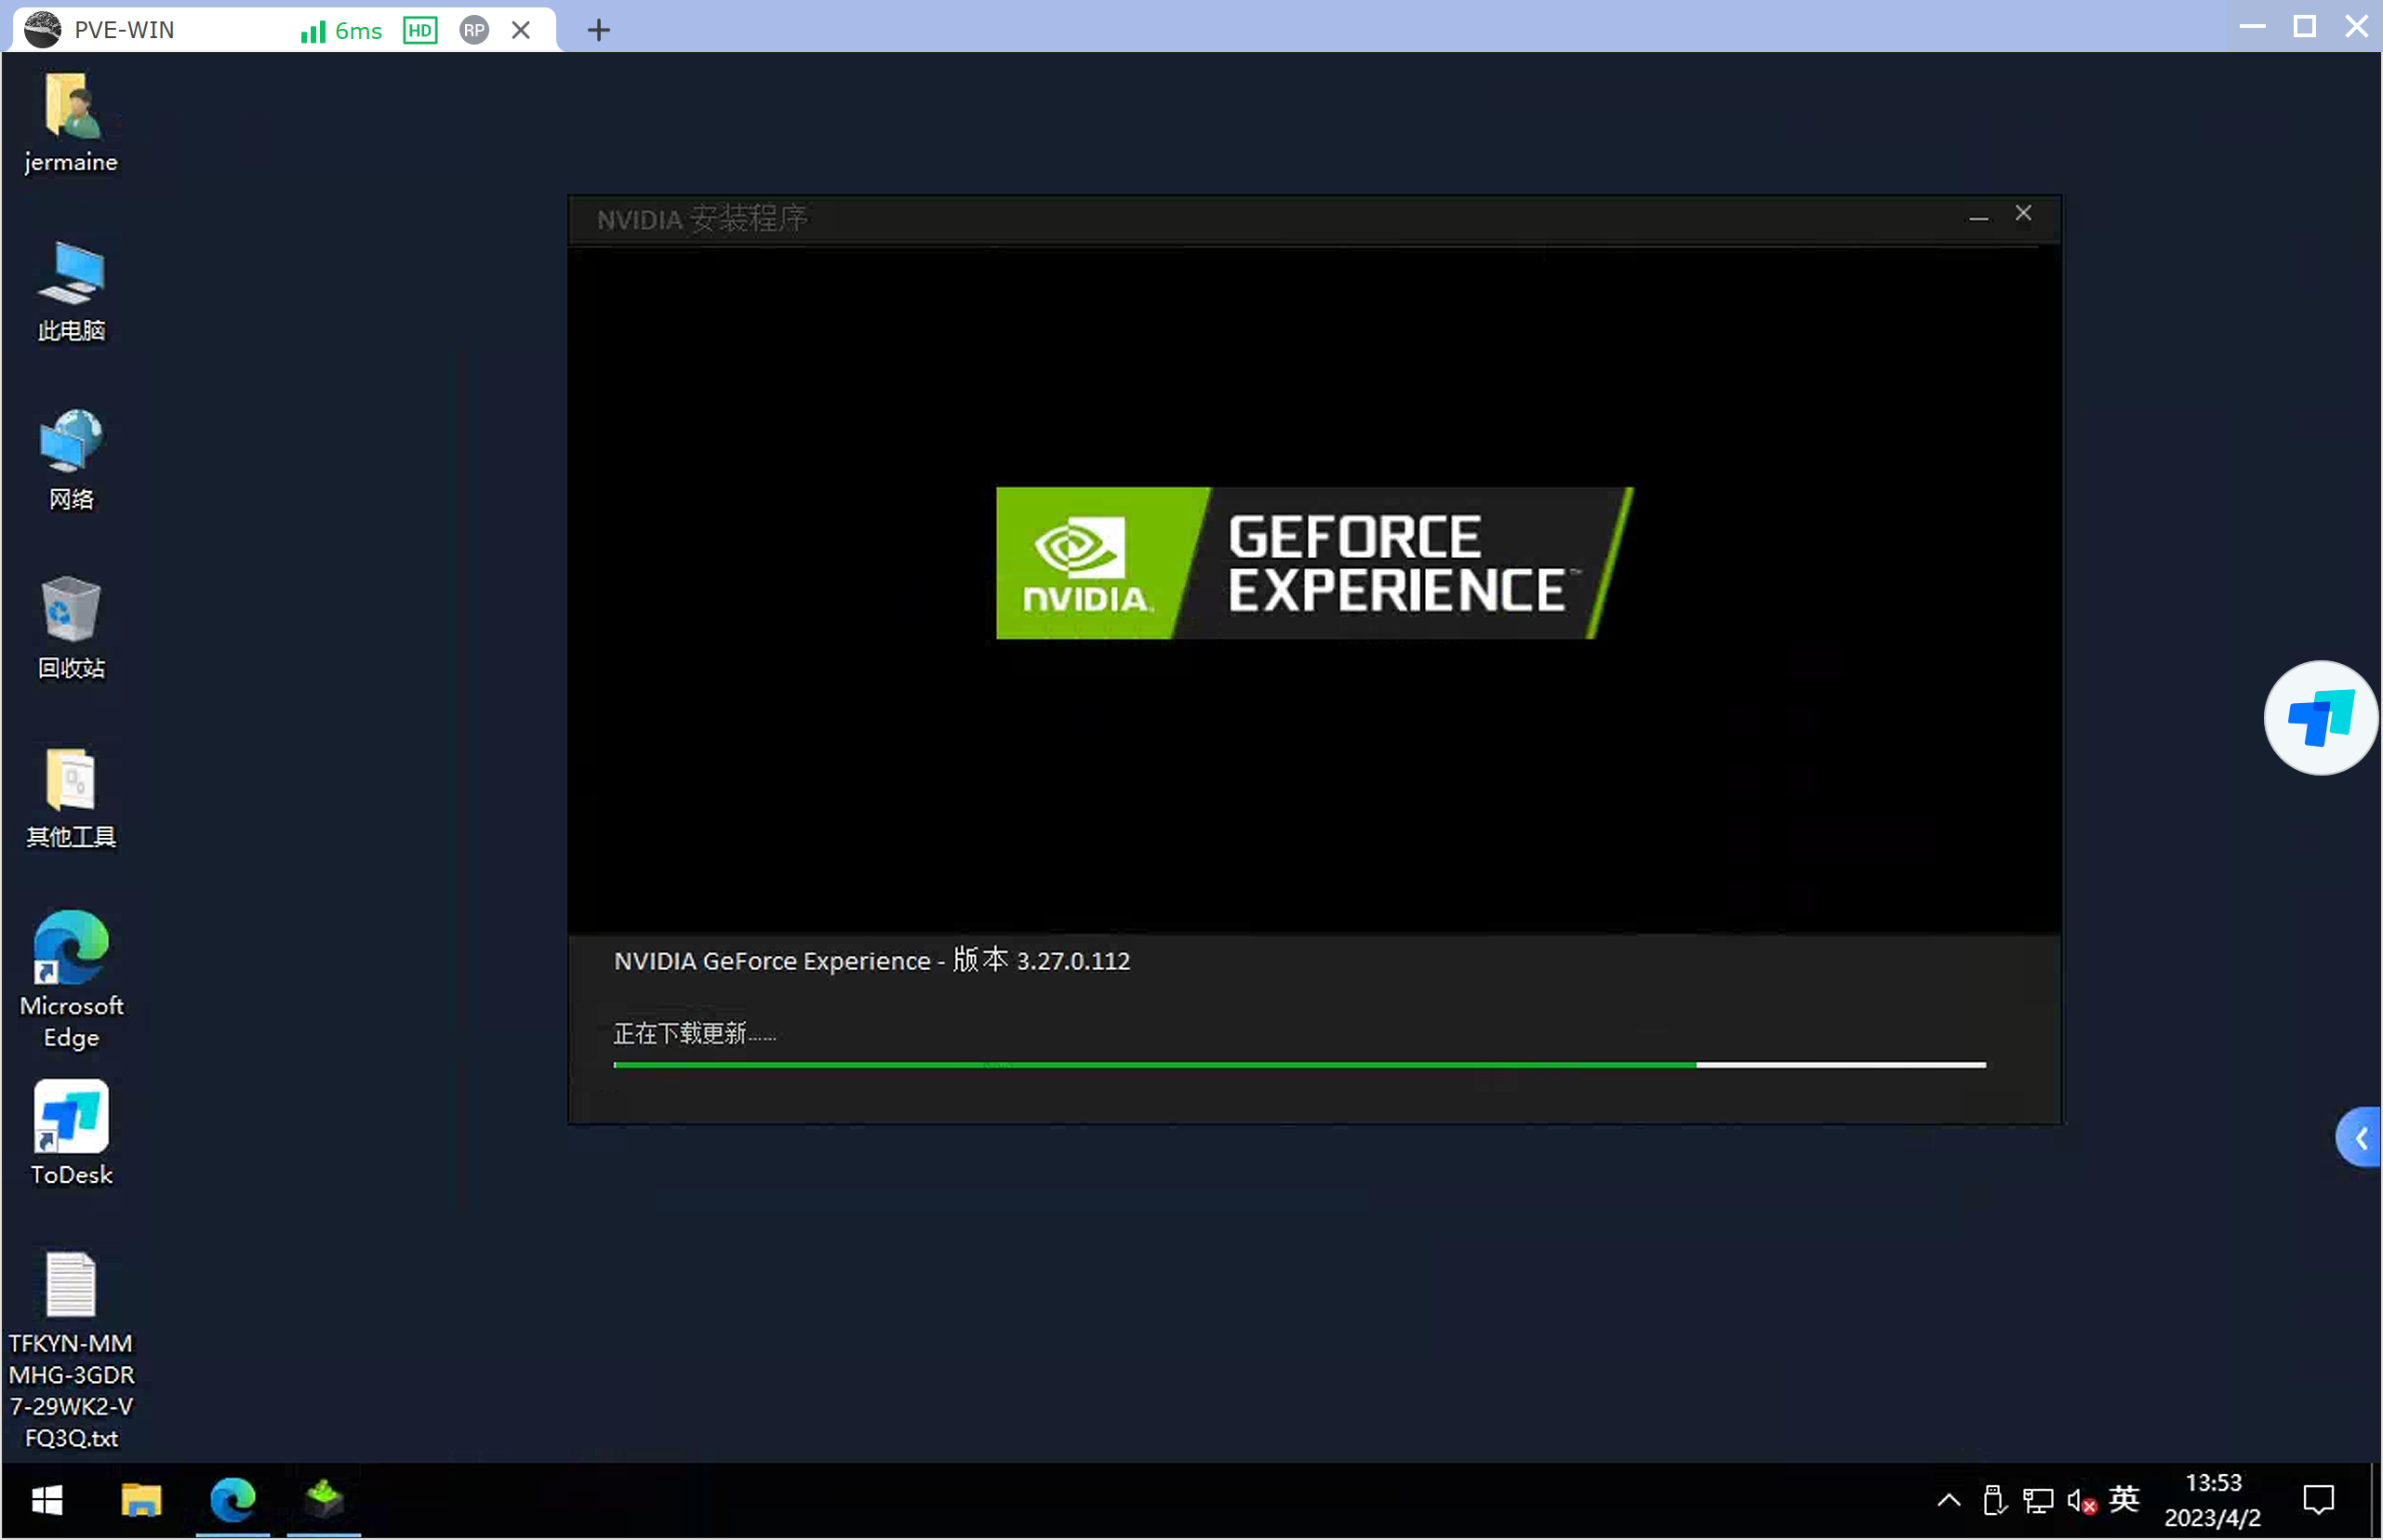
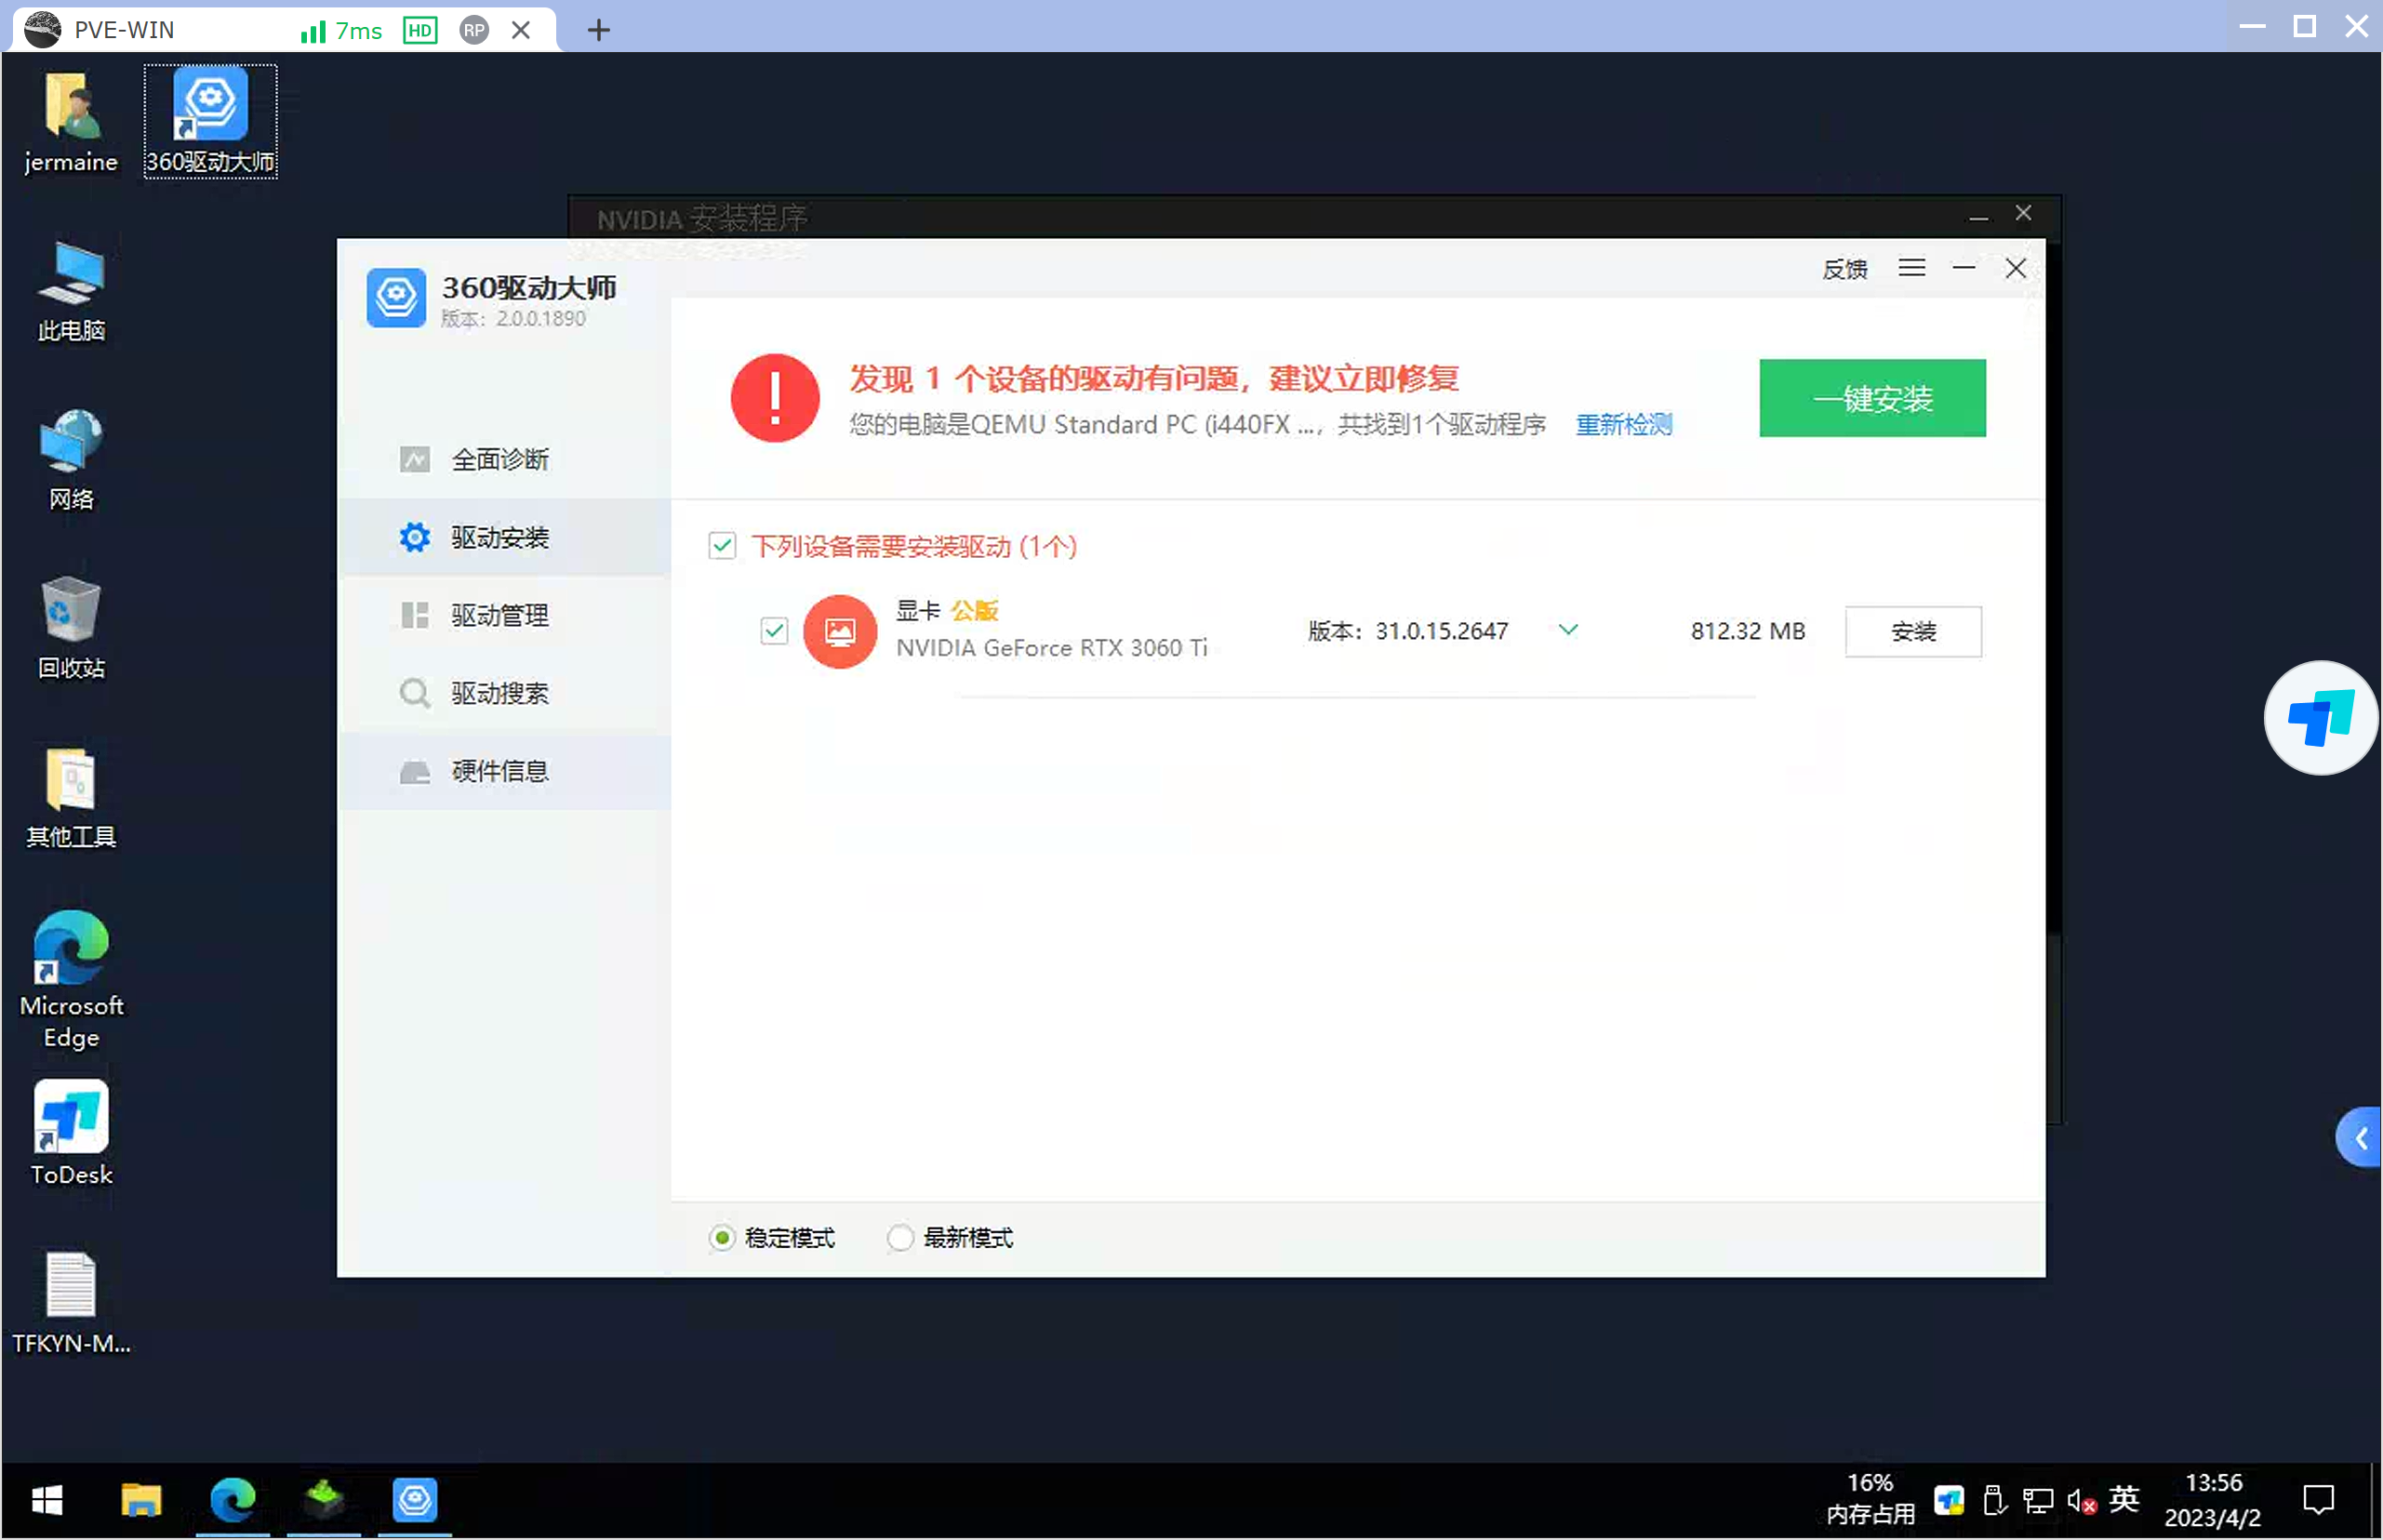
随后正常开机然后安装显卡驱动即可。
PVE 的硬件直通是一个道阻且长的过程,建议在非生产环境中执行,并在执行前对相关配置及系统进行备份。受系统更新影响,本篇文章可能不适用于最新系统。
引用资料
在 PVE 7 中启用硬件直通功能 – 拾梦纪 (never666.uk)
可無視 No /etc/kernel/proxmox-boot-uuids found, skipping ESP sync.錯誤_三十一度 (31du.cn)