SpringCloud微服务系列04-Alibaba架构01-Gateway-05-配合注册中心简单的使用
在之前的文章介绍了Spring Cloud Gateway的Predict(断言)、Filter(过滤器),大家对Spring Cloud Gateway有初步的认识,其中在对服务路由转发的这一块,在之前的文章是采用硬编码的方式进行路由转发。这篇文章以案例的形式来讲解Spring Cloud Gateway如何配合服务注册中心进行路由转发。
准备工作
- 本章alibaba下的gateway项目
- netflix章节的三个项目
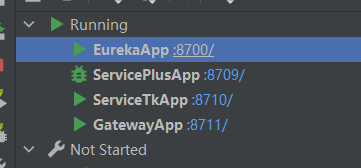
- ServicePlusApp :8709/
- ServiceTkApp :8710/
- EurekaApp :8700/
使用之前的项目测试方便快捷
目录结构
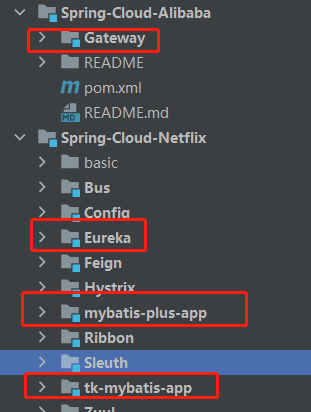
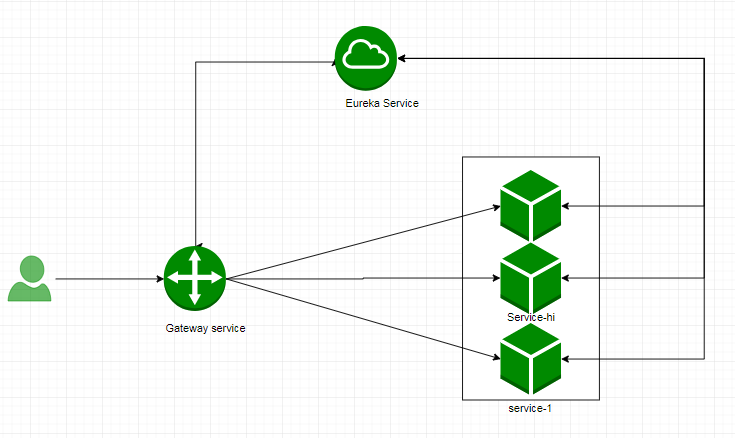
这三个工程中,其中service-tk ,service-plus, gateway向注册中心eureka注册。用户的请求首先经过gateway,根据路径由gateway的predict 去断言进到哪一个 router, router经过各种过滤器处理后,最后路由到具体的业务服务
快速开始
Gateway 项目的 pom.xml
1
2
3
4
5
6
7
8
9
10
11
12
13
14
15
16
17
18
19
20
21
22
23
24
25
26
27
28
29
30
31
32
33
34
35
36
37
38
39
40
41
42
43
44
45
46
47
| <?xml version="1.0" encoding="UTF-8"?>
<project xmlns="http://maven.apache.org/POM/4.0.0"
xmlns:xsi="http://www.w3.org/2001/XMLSchema-instance"
xsi:schemaLocation="http://maven.apache.org/POM/4.0.0 http://maven.apache.org/xsd/maven-4.0.0.xsd">
<parent>
<artifactId>Spring-Cloud-Alibaba</artifactId>
<groupId>cn.zm</groupId>
<version>1.0-SNAPSHOT</version>
</parent>
<modelVersion>4.0.0</modelVersion>
<artifactId>Gateway</artifactId>
<properties>
<maven.compiler.source>8</maven.compiler.source>
<maven.compiler.target>8</maven.compiler.target>
</properties>
<dependencies>
<dependency>
<groupId>org.springframework.cloud</groupId>
<artifactId>spring-cloud-starter-netflix-eureka-client</artifactId>
</dependency>
<dependency>
<groupId>org.springframework.cloud</groupId>
<artifactId>spring-cloud-starter-gateway</artifactId>
</dependency>
<dependency>
<groupId>org.springframework.cloud</groupId>
<artifactId>spring-cloud-starter-netflix-hystrix</artifactId>
</dependency>
<dependency>
<groupId>org.springframework.boot</groupId>
<artifactId>spring-boot-starter-data-redis-reactive</artifactId>
</dependency>
</dependencies>
</project>
|
application.yml
1
2
3
4
5
6
7
8
9
10
11
12
13
14
15
16
17
18
19
20
21
22
23
24
25
26
27
28
29
30
31
32
33
34
35
36
37
38
39
| server:
port: 8711
spring:
profiles:
active: gateway-router
application:
name: gateway-8711
---
spring:
profiles: gateway-router
cloud:
gateway:
discovery:
locator:
enabled: false
lowerCaseServiceId: true
routes:
- id: service-tk-8710
uri: lb://service-tk-8710
predicates:
- Path=/tk/**
filters:
- StripPrefix=1
- id: service-plus-8709
uri: lb://service-plus-8709
predicates:
- Path=/plus/**
filters:
- StripPrefix=1
eureka:
client:
serviceUrl:
defaultZone: http://localhost:8700/eureka/
|
main
1
2
3
4
5
6
7
8
9
10
11
12
13
14
| package cn.zm;
import org.springframework.boot.SpringApplication;
import org.springframework.boot.autoconfigure.SpringBootApplication;
import org.springframework.cloud.netflix.eureka.EnableEurekaClient;
@EnableEurekaClient
@SpringBootApplication
public class GatewayApp {
public static void main(String[] args) {
SpringApplication.run(GatewayApp.class);
}
}
|
最后将之前的config自定义的bean全部注释
因为在配置这个地方就已经启用断言然后路由了
启动测试
注册中心状态

通过网关访问tk项目
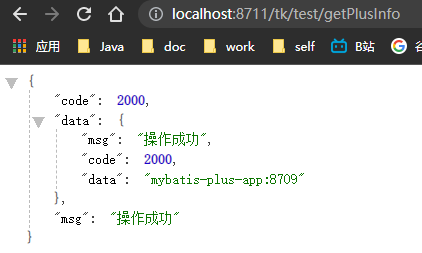
通过网关访问plus项目
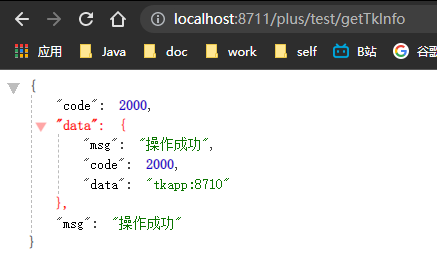
一个简单的gateway项目最基本的功能就实现了
引用资料
https://www.fangzhipeng.com/springcloud/2018/12/23/sc-f-gateway5.html